xibを利用したカスタムセルの使い方
お久しぶりです。
今回から私の開発環境のxcodeのバージョンをタイトルに載せる事にしました。
というのも私自身、他の方々のソースコードを参考にする際、xcodeのバージョン違いで
悩まされる事があり、xcodeのバージョンが載せてあるブログに出会うと、「ありがたい!」と思う事が多々あったからです。
今日のお題はカスタムセルの使い方について。
中でも、xibを使ったカスタムセルの使い方に慣れておくと、
セル自体に様々な値を保持させる事が可能になる等、プログラミングの幅が
増えますので、覚えておいて損は無いです。
という事で作り方。
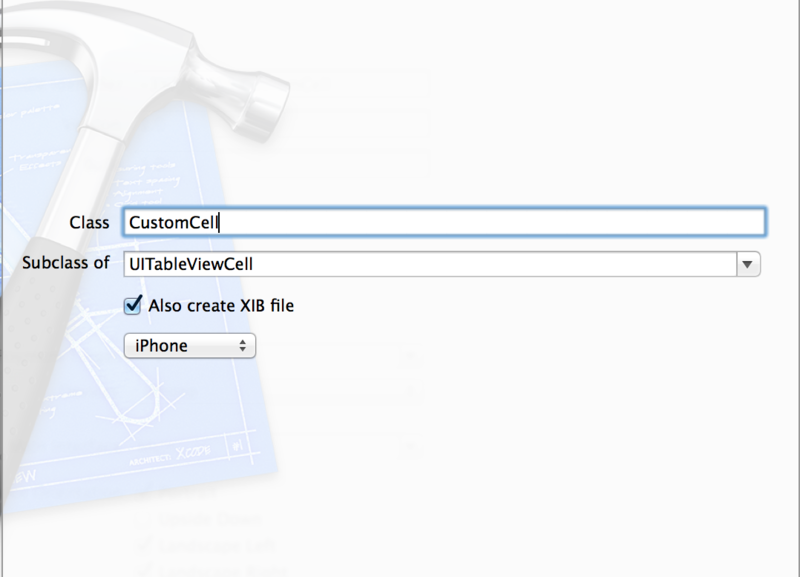
1.プロジェクトの作成

ここでは「CustomCell」と命名。さらに下の「Also create XIB file」にチェックを
入れ、プロジェクトを作成。
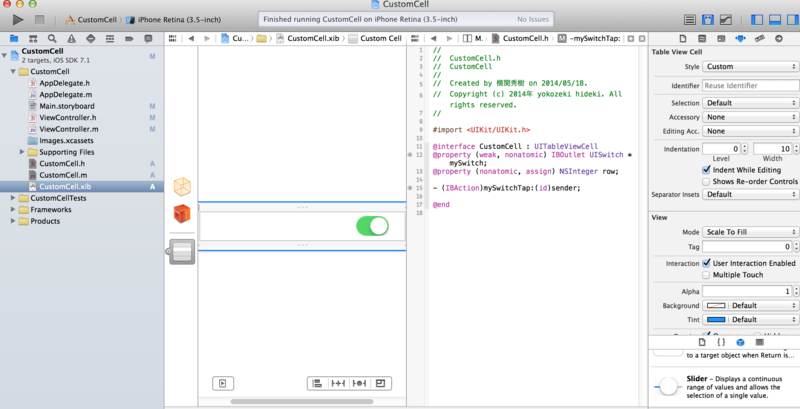
2.xibファイルの編集

CustomCell.xibファイルを開くとUserStoryboardに似た画面が表示されるので、
Switchをセル上に貼付ける。
※1.で説明した「Also create XIB file」にチェックを入れてなかった場合、xibファイルが作成されないので注意。
3.Assistant editorで関連付け

Assistant editor(画面右上の蝶ネクタイみたいなマーク)をクリックし、
右画面にはCustomCell.hを表示させる。
その後、下記作業を行う。
1.下記コードをCustomCell.hに記入。
@property (nonatomic, assign) NSInteger row;
2.スイッチを右クリックしながら右画面に引っぱり、
Outletを選択、NameにはmySwitchと記入し、Connect
3.スイッチを右クリックしながら右画面に引っぱり、
Actionを選択、NameにはmySwitchTapと記入
4.CustomCell.mを開き mySwitchTapメソッドの中を下記の通りに変更。
- (IBAction)mySwitchTap:(id)sender {
if(self.mySwitch.on){
NSLog(@"Switch%d is ON",self.row);
}else{
NSLog(@"Switch%d is OFF",self.row);
}
}
4.テーブルビューにカスタムセルを張り付け
 1.MainStoryboardを開き。TableViewを追加。
ViewController.h
2. ViewControllerを開き、"CustomCell.h"をimportする。
次に、DataCource、Delegateを追加。
この2点は忘れがちですが、TableView使う上での決まりきったお作法です。
#import <UIKit/UIKit.h>
#import "CustomCell.h"
@interface ViewController : UIViewController<UITableViewDataSource, UITableViewDelegate>
※ここは手書きで追加
追加したら、TableViewをAssistant editorでViewController.hに関連付け(右クリックで引っ張って名前付け)。
ViewController.hが下記ソースになっていれば正解。
#import <UIKit/UIKit.h>
#import "CustomCell.h"
@interface ViewController : UIViewController< UITableViewDataSource, UITableViewDelegate>
@property (weak, nonatomic) IBOutletUITableView *tableView;
@end
3.ViewController.mの編集
ViewControllerは下記ソースをコピーする。
#import "ViewController.h"
@interfaceViewController (){
NSArray* cellRows;
}
@end
@implementation ViewController
- (void)viewDidLoad
{
[superviewDidLoad];
// Do any additional setup after loading the view, typically from a nib.
self.tableView.dataSource = self;
self.tableView.delegate = self;
cellRows = @[@"cell1", @"cell2", @"cell3"];
// カスタムセルを使用
UINib *nib = [UINibnibWithNibName:@"CustomCell"bundle:nil];
[self.tableViewregisterNib:nib forCellReuseIdentifier:@"Cell"];
}
- (NSInteger)numberOfSectionsInTableView:(UITableView *)tableView
{
return 1;
}
- (NSInteger)tableView:(UITableView *)tableView numberOfRowsInSection:(NSInteger)section
{
returncellRows.count;
}
- (UITableViewCell *)tableView:(UITableView *)tableView
cellForRowAtIndexPath:(NSIndexPath *)indexPath
{
CustomCell *cell = [tableView dequeueReusableCellWithIdentifier:@"Cell"
forIndexPath:indexPath];
cell.row = indexPath.row;
return cell;
}
- (void)didReceiveMemoryWarning
{
[superdidReceiveMemoryWarning];
// Dispose of any resources that can be recreated.
}
@end
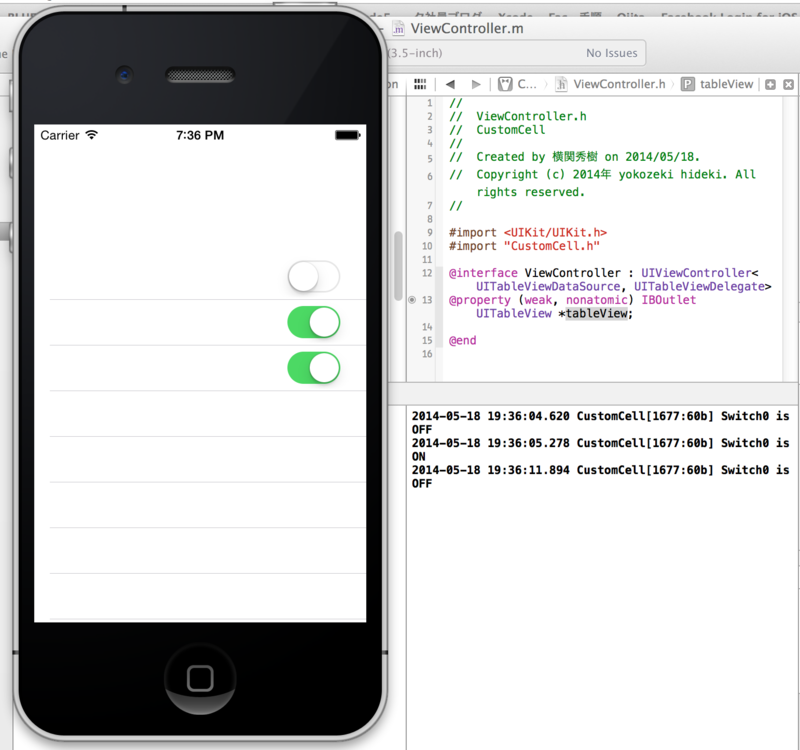
4.出来上がったプログラムを実行。
NSLog上にどのスイッチが"ON"or"OFF"されたのかを表示します。
セルごとに配置されているオブジェクトのデータの状態を取得するのは
少し面倒なのですが、xibファイルを使うとこんなに簡単なソースで
色んな情報を保持させる事が可能です。うーん便利。

TableViewは奥が深い。Storyboardだけで今回のような実装も出来る事は出来るのですが、ちょっと面倒でした。機会があればそちらも紹介したいと思います。
それではまた。